Matching your Amazon Seller Sales Entry to Amazon's Reporting
Understanding how Bookkeep posts Amazon Seller sales is critical to align with the reporting from Amazon Seller. Below we show the side-by-side alignment between the Amazon Seller reporting and our journal entry for Amazon Seller sales.
Accessing Amazon Seller Reports
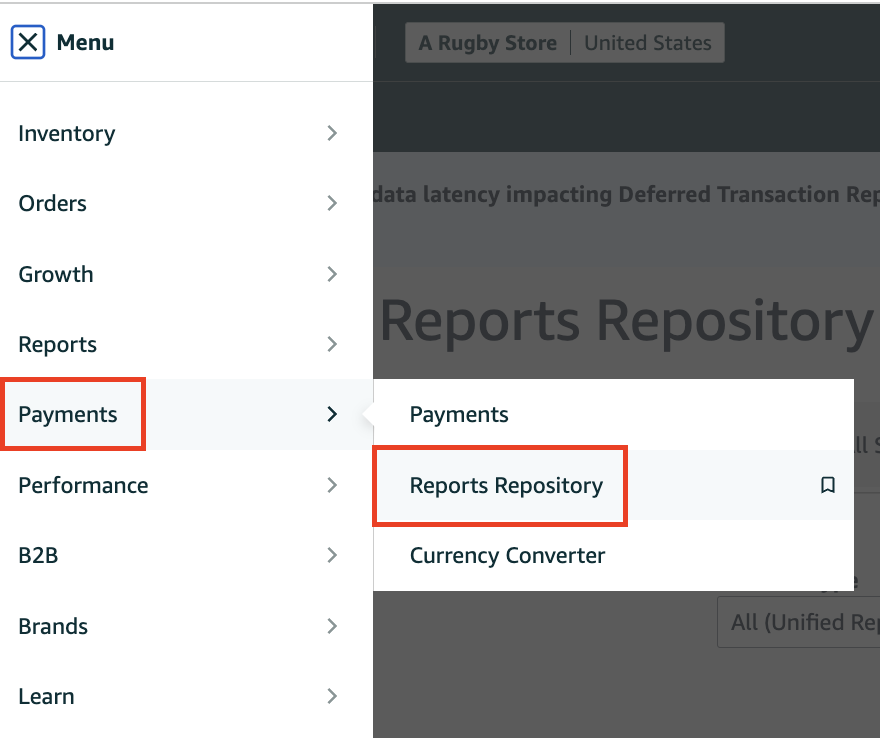
Step 1: Navigate to Reports Repository
First, once you have logged into your Amazon Seller dashboard, you will need to locate ‘Payments’ then ‘Reports Repository’.
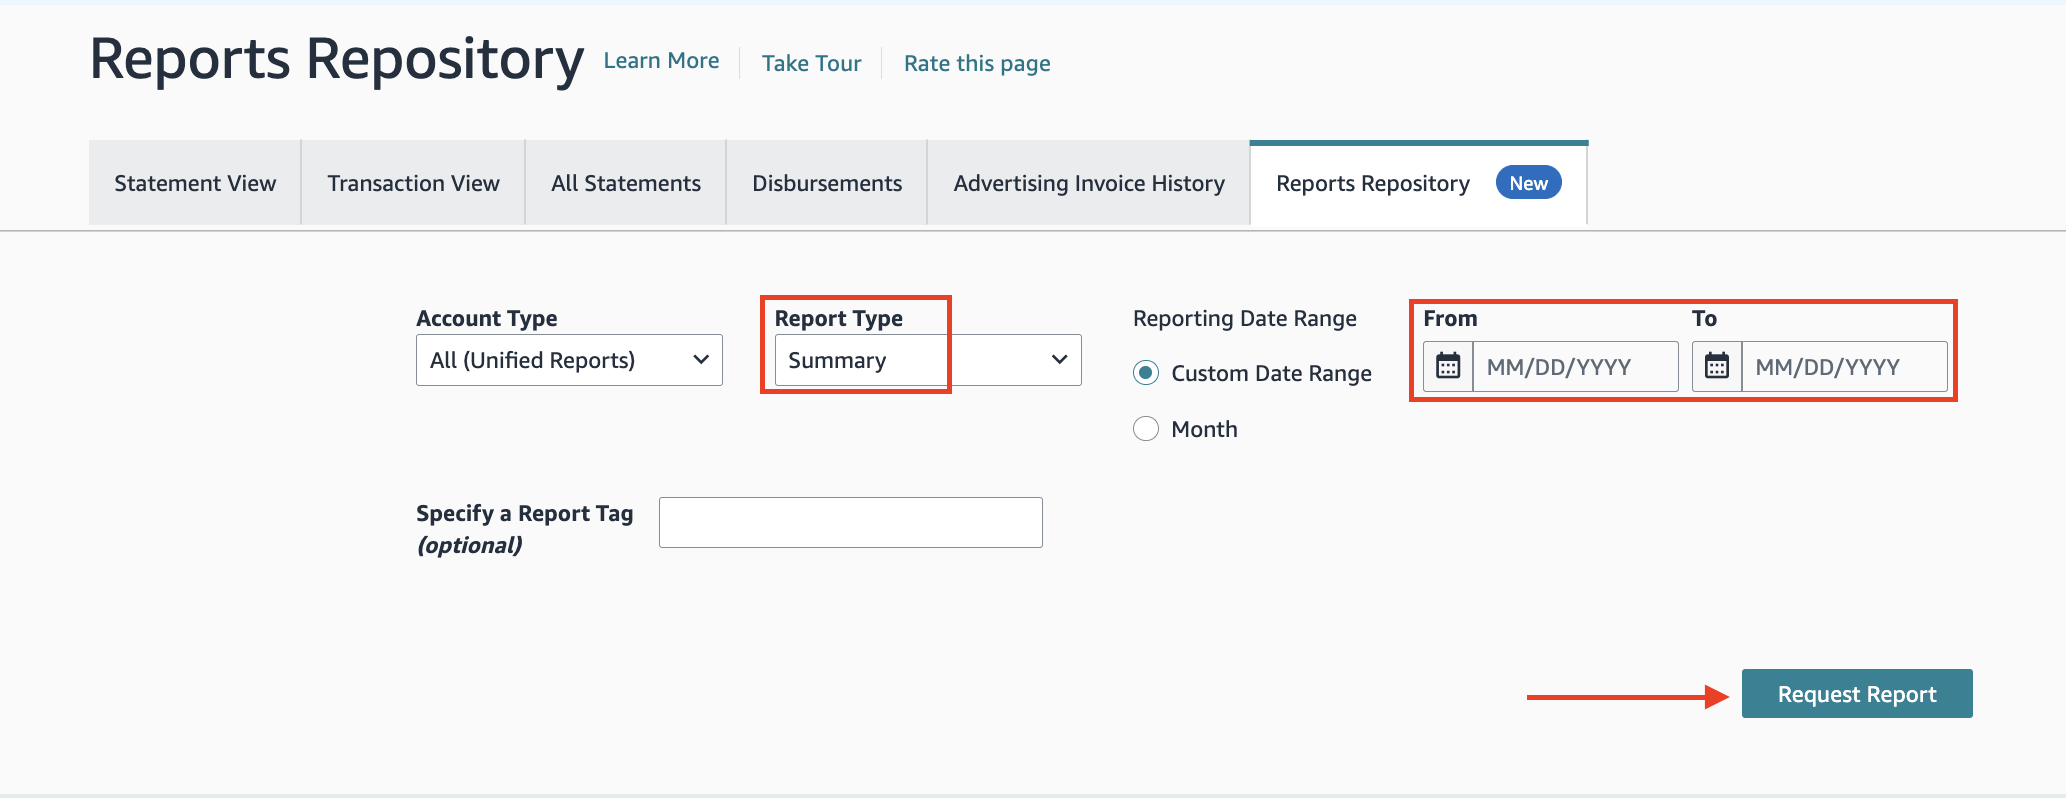
Step 2: Generate Report
Select the report type ‘summary’, the desired date range and then click ‘request report’ to generate a PDF report
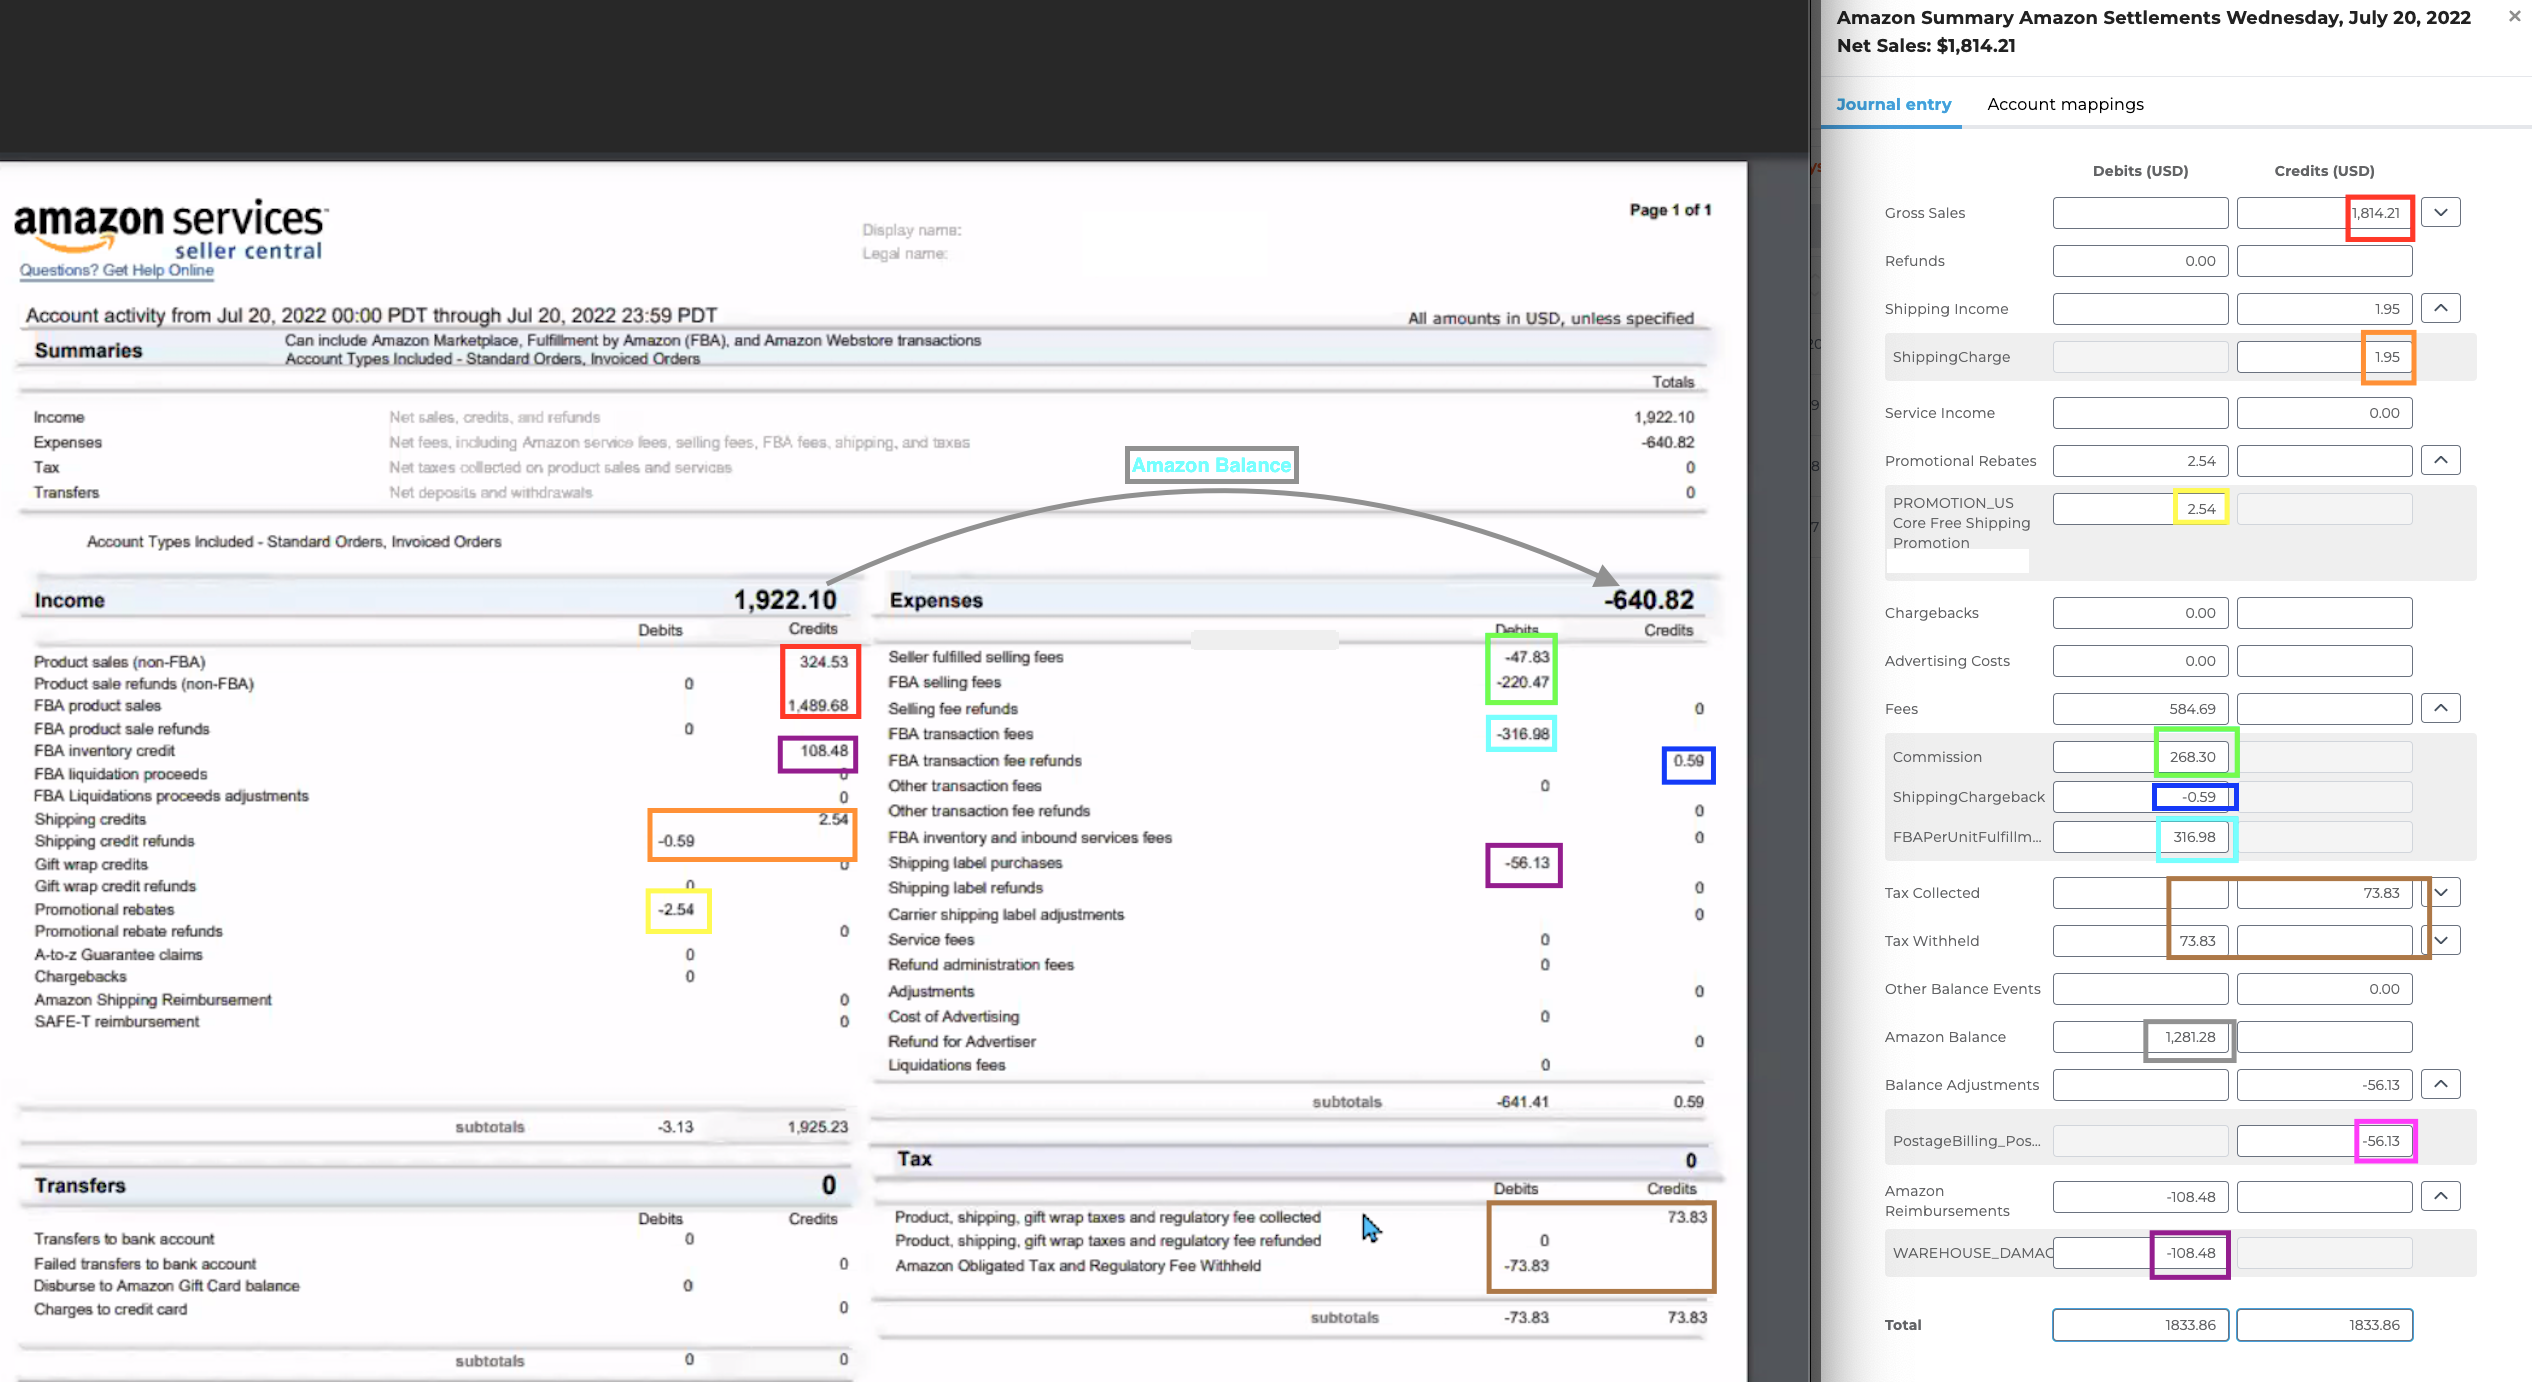
Comparing Reports with Bookkeep
This will download a PDF, which is displayed below with an example Bookkeep journal entry for Amazon Seller Sales. The color code indicates the alignment of numbers in the report to the Amazon Seller Sales Summary journal entry:
Please write to us at [email protected] if you have any questions.